INSTALL YOUR LIBRARY INTO KONTAKT
KONTAKT 6
Instructions for installing into Kontakt 7 are further down this page.
Our instruments require manual installation into Kontakt (it does not use N.I.’s Native Access).
INSTALLATION Once you’ve downloaded the instrument, copy it to a hard drive location of your choice.
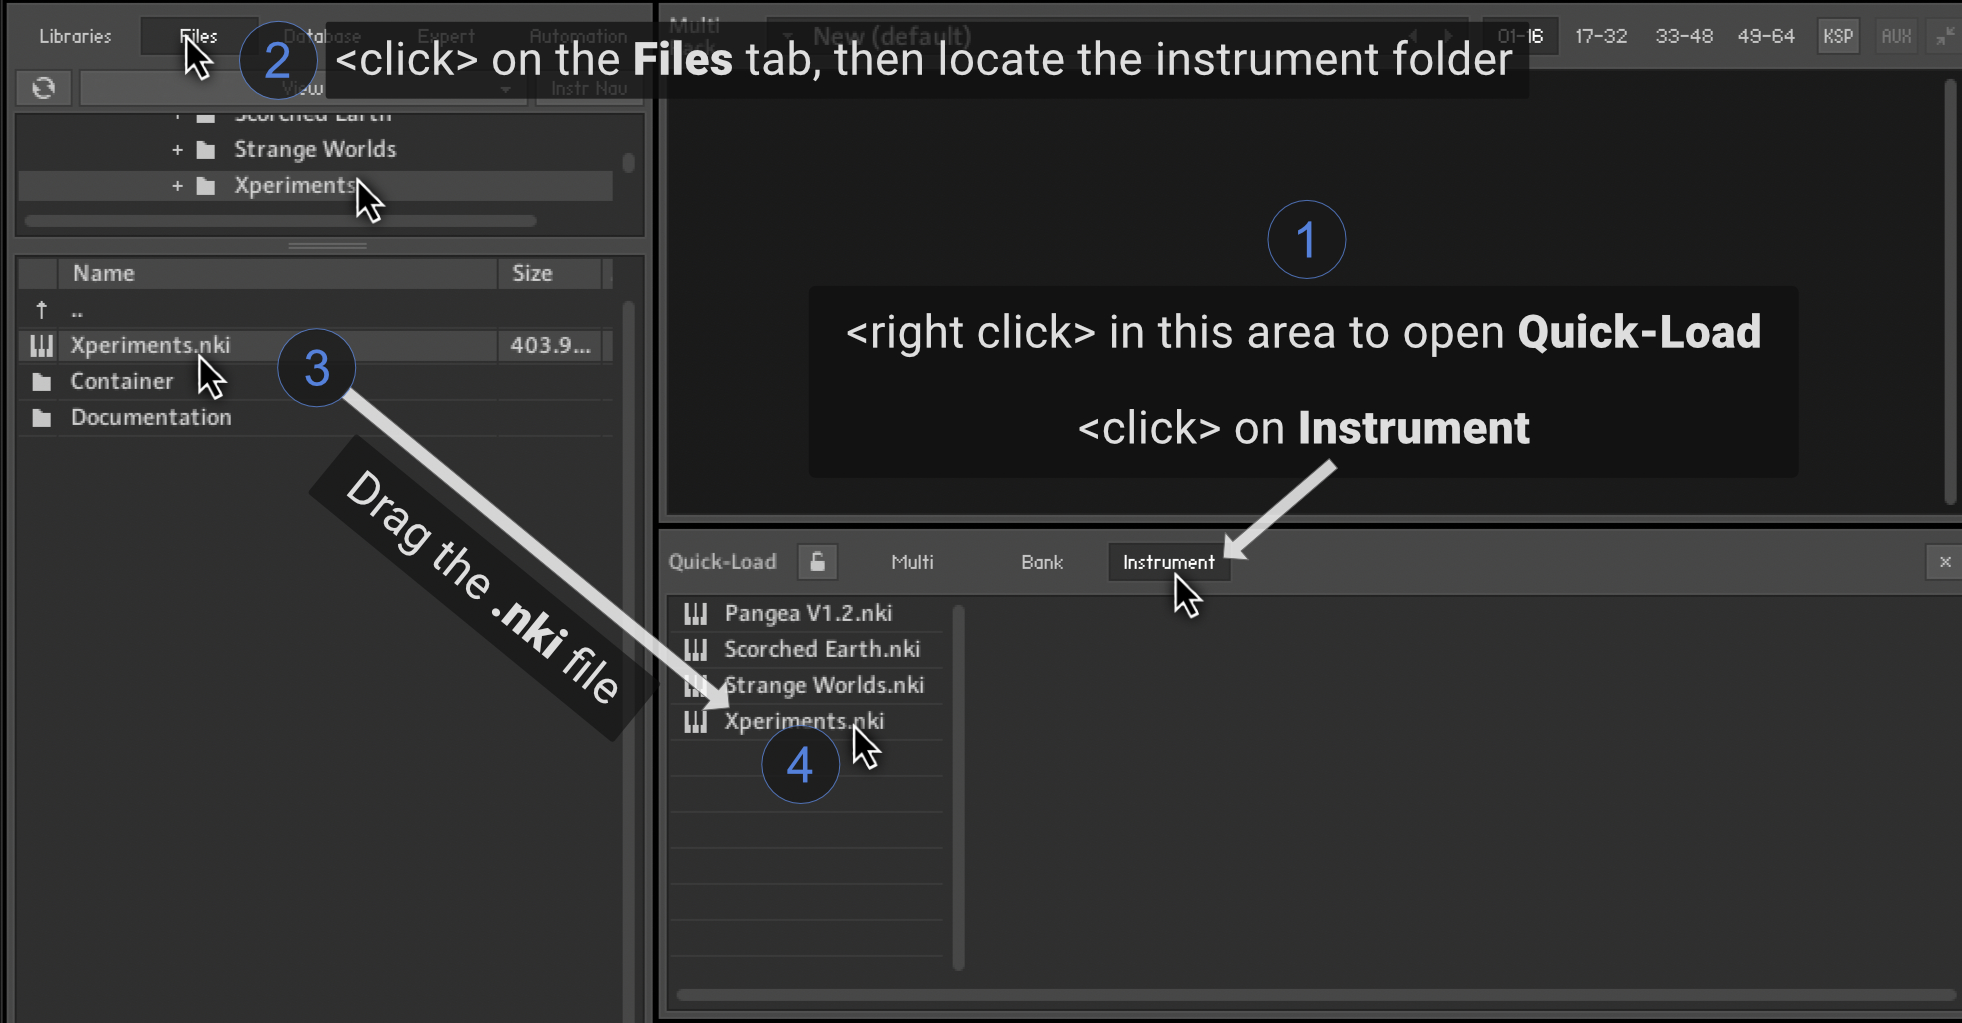
LOADING THE INSTRUMENT First, we recommend adding it to Kontakt 6’s Quick-Load area.
To do this, follow the steps in the diagram below…
After adding the library to Kontatk’s Quick-Load area, open the library by…
<Right clicking> in area 1 to open Quick-Load.
<Double clicking> on the instrument name in area 4.
KONTAKT 7
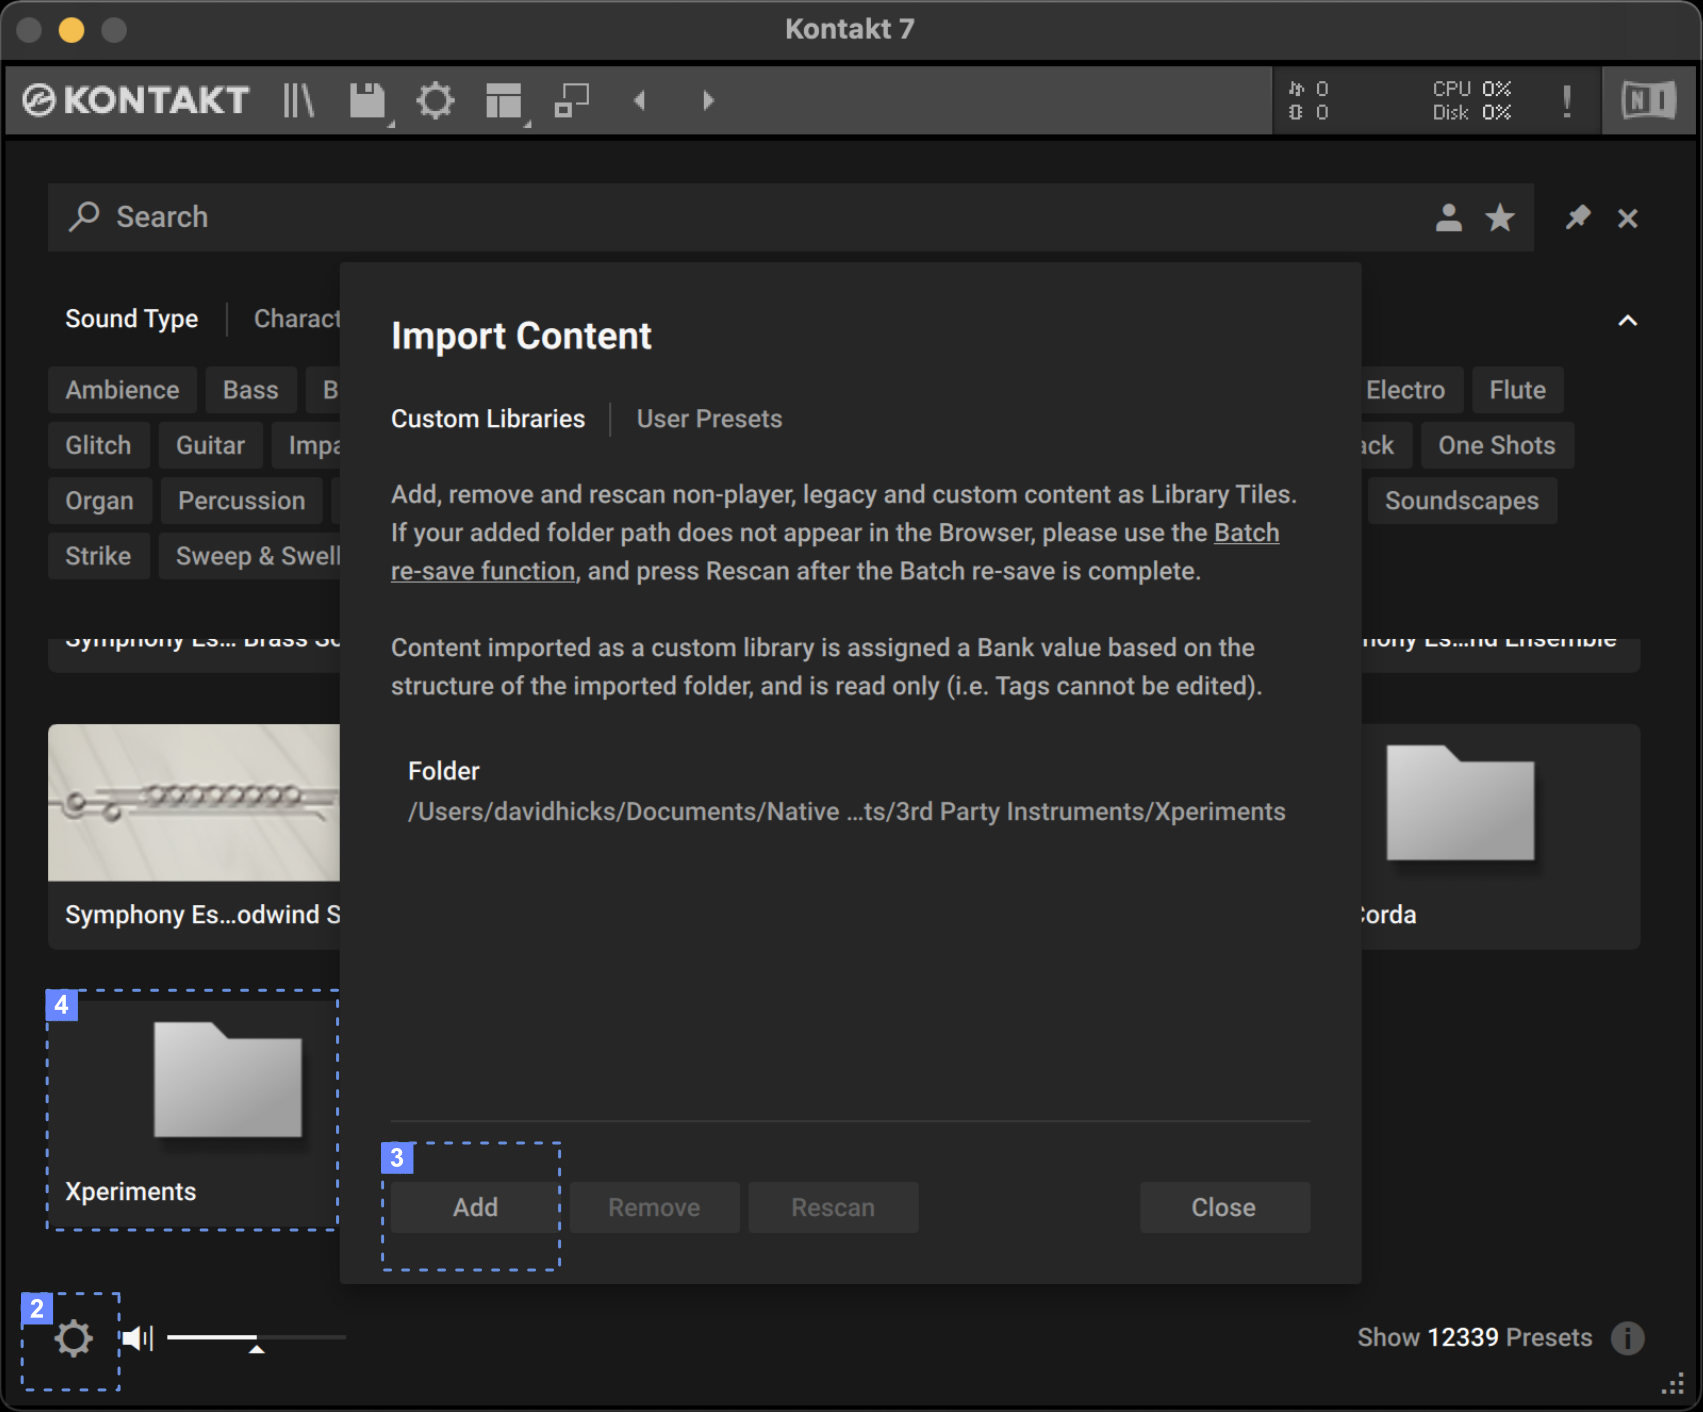
1 Click on the icon in the top-left of Kontakt 7 (blue circle above) to display your list of your libraries.
2 Click on the settings icon (cog icon) in the bottom-left of Kontakt’s library page.
3 Click ‘Add’. Next, locate and select the library’s main folder (the folder you downloaded from us), then click ‘Open’ in the bottom-right of the window that appears.
4 The library will now appear in Kontakt 7’s library area. (i) Click on the grey folder icon that has the library’s name underneath it. The library name will now appear in a menu on the far-right of Kontakt. (ii) Double-click on the library’s name in the far-right menu to open it.


